Experience shows that you can never be too paranoid about system backups. When it comes to protecting and preserving precious data, it is best to go the extra mile and make sure you can depend on your backups if the need arises.
 Duplicity – Create Encrypted Linux File System Backups
Even today, when some cloud and hosting providers offer automated backups for VPS’s at a relatively low cost, you will do well to create your own backup strategy using your own tools in order to save some money and then perhaps use it to buy extra storage or get a bigger VPS.
Sounds interesting? In this article we will show you how to use a tool called Duplicity to backup and encrypt file and directories. In addition, using incremental backups for this task will help us to save space.
That said, let’s get started.
Duplicity – Create Encrypted Linux File System Backups
Installing Duplicity
To install duplicity in Fedora-based distros, you will have to enable the EPEL repository first (you can omit this step if you’re using Fedora itself):
Then run,
For Debian and derivatives:
In theory, many methods for connecting to a file server are supported although only ssh/scp/sftp, local file access, rsync, ftp, HSI, WebDAV and Amazon S3 have been tested in practice so far.
Once the installation completes, we will exclusively use sftp in various scenarios, both to back up and to restore the data.
Our test environment consists of a CentOS 7 box (to be backed up) and a Debian 8 machine (backup server).
Creating SSH keys to access remote servers and GPG keys for encryption
Let’s begin by creating the SSH keys in our CentOS box and transfer them to the Debian backup server.
The below commands assumes the sshd daemon is listening on port XXXXX in the Debian server. ReplaceAAA.BBB.CCC.DDD with the actual IP of the remote server.
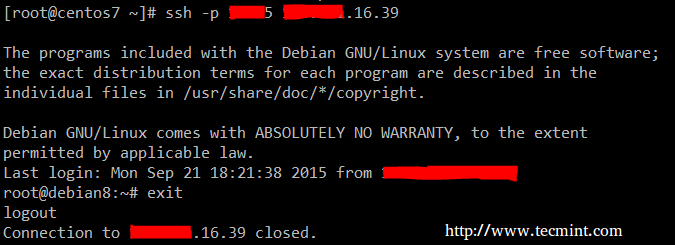
Then you should make sure that you can connect to the backup server without using a password:
 Create SSH Keys
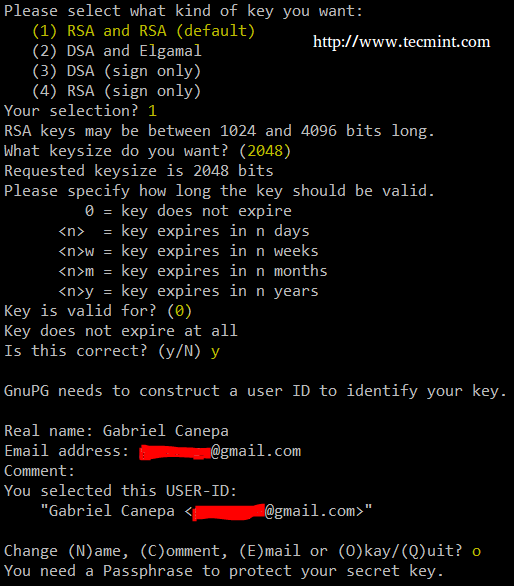
Now we need to create the GPG keys that will be used for encryption and decryption of our data:
You will be prompted to enter:
Create SSH Keys
Now we need to create the GPG keys that will be used for encryption and decryption of our data:
You will be prompted to enter:
- Kind of key
- Key size
- How long the key should be valid
- A passphrase
 Create GPG Keys
To create the entropy needed for the creation of the keys, you can log on to the server via another terminal window and perform a few tasks or run some commands to generate entropy (otherwise you will have to wait for a long time for this part of the process to finish).
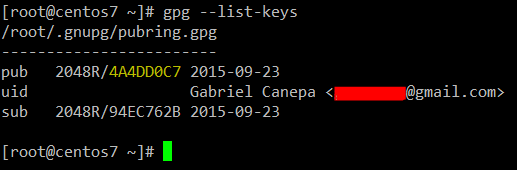
Once the keys have been generated, you can list them as follows:
Create GPG Keys
To create the entropy needed for the creation of the keys, you can log on to the server via another terminal window and perform a few tasks or run some commands to generate entropy (otherwise you will have to wait for a long time for this part of the process to finish).
Once the keys have been generated, you can list them as follows:
 List Generated GPG Keys
The string highlighted in yellow above is known as the public key ID, and is a requested argument to encrypt your files.
List Generated GPG Keys
The string highlighted in yellow above is known as the public key ID, and is a requested argument to encrypt your files.
Create SSH Keys
Create GPG Keys
List Generated GPG Keys
Creating a backup with Duplicity
To start simple, let’s only backup the /var/log directory, with the exception of /var/log/anaconda and/var/log/sa.
Since this is our first backup, it will be a full one. Subsequent runs will create incremental backups (unless we add the full option with no dashes right next to duplicity in the command below):
Make sure you don’t miss the double slash in the above command! They are used to indicate an absolute path to a directory named /backups/centos7 in the backup box, and is where the backup files will be stored.
Replace YourPassphraseHere, YourPublicKeyIdHere and RemoteServer with the passphrase you entered earlier, the GPG public key ID, and with the IP or hostname of the backup server, respectively.
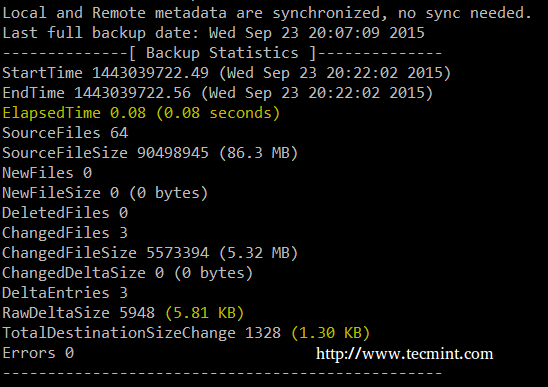
Your output should be similar to the following image:

Create Backup using Duplicity
The image above indicates that a total of 86.3 MB was backed up into a 3.22 MB in the destination. Let’s switch to the backup server to check on our newly created backup:
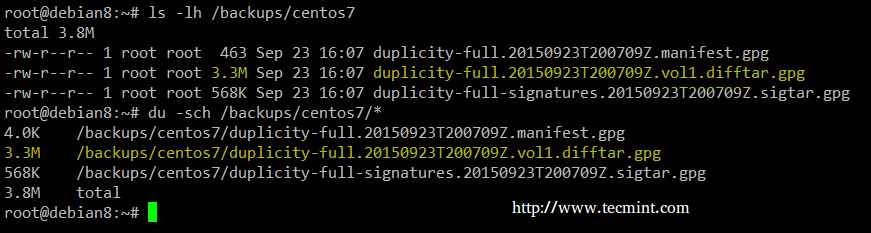
Confirm Backup File
A second run of the same command yields a much smaller backup size and time:
Compress Backup
Restoring backups using Duplicity
To successfully restore a file, a directory with its contents, or the whole backup, the destination must not exist (duplicity will not overwrite an existing file or directory). To clarify, let’s delete the cron log in the CentOS box:
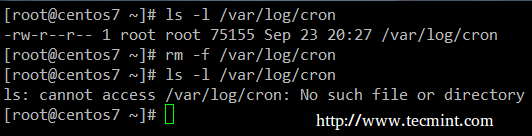
Delete Cron Logs
The syntax to restore a single file from the remote server is:
where,
- filename is the file to be extracted, with a relative path to the directory that was backed up
- /where/to/restore is the directory in the local system where we want to restore the file to.
In our case, to restore the cron main log from the remote backup we need to run:
The cron log should be restored to the desired destination.
Likewise, feel free to delete a directory from /var/log and restore it using the backup:
In this example, the mail directory should be restored to its original location with all its contents.
Other features of Duplicity
At any time you can display the list of archived files with the following command:
Delete backups older than 6 months:
Restore myfile inside directory gacanepa as it was 2 days and 12 hours ago:
In the last command, we can see an example of the usage of the time interval (as specified by -t): a series of pairs where each one consists of a number followed by one of the characters s, m, h, D, W, M, or Y (indicating seconds, minutes, hourse, days, weeks, months, or years respectively).